ESPHome tutorial: monitor your home temperature with an ESP32 and a Xiaomi Mijia
I wanted to check the temperature at home from outside. Is the living room freezing? Did I leave the heating on all day? A simple question, and I did not want to pay for a cloud service to answer it.
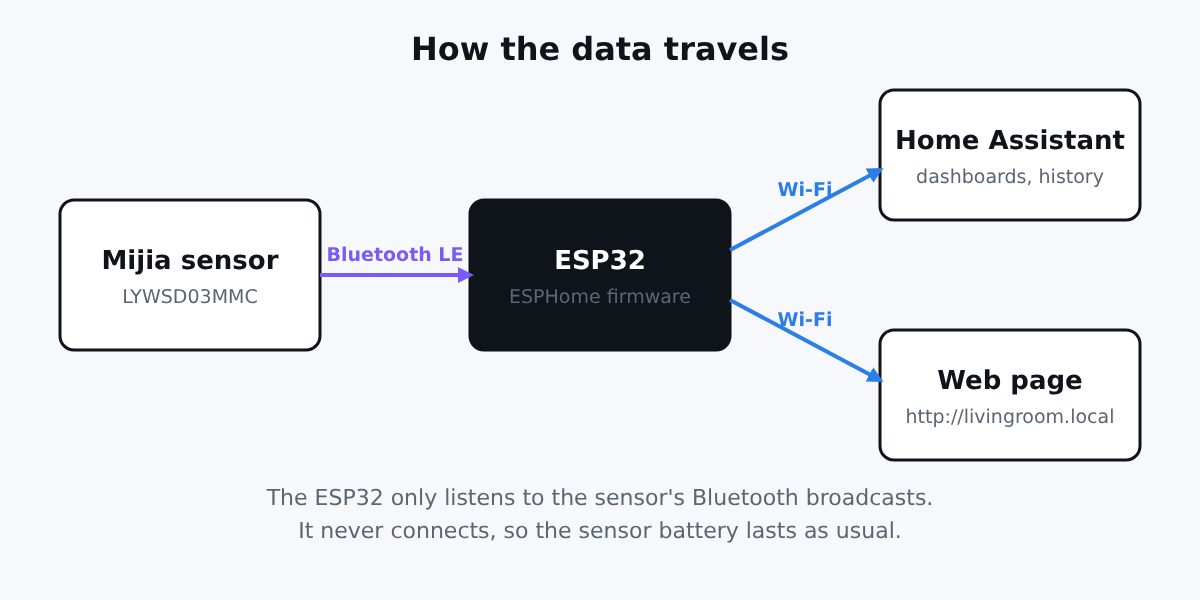
The answer was already on my desk: a Xiaomi Mijia Bluetooth thermometer (the small LCD one, model LYWSD03MMC, around 4 euros) and an ESP32. The thermometer measures, the ESP32 listens and puts everything on your Wi-Fi. No account, no app, no cloud.
What you need
- An ESP32 DevKit: the ESP32 DevKit works perfectly, it has Wi-Fi and Bluetooth built in. If you want more memory for bigger projects, take the ESP32-S3 N16R8.
- A Xiaomi Mijia LYWSD03MMC thermometer.
- A USB data cable (not a charge-only one, see our first steps checklist).
- A computer to flash the first firmware. After that, updates go over Wi-Fi.
What is ESPHome?
ESPHome turns a short YAML file into a complete firmware for your ESP32. You describe what you have ("a Xiaomi thermometer at this address"), ESPHome writes and compiles the code. You get Wi-Fi, a small web page, over-the-air updates and a native connection to Home Assistant for free. You do not write a single line of C++.
Step 1: find the MAC address
Every Bluetooth device has a MAC address. ESPHome needs it to know which thermometer to listen to.
The simplest way is to let the ESP32 scan. Flash a minimal config with esp32_ble_tracker: and watch the logs: ESPHome prints every device it sees, including the Mijia ones (their name looks like LYWSD03MMC). On Linux you can also run bluetoothctl then scan on.
Write the address down, for example A4:C1:38:12:34:56.
Step 2: get the bindkey
Recent Mijia thermometers encrypt their broadcasts. ESPHome needs the bindkey (a 32-character key) to read them. Two options:
- Keep the stock firmware: pair the thermometer once with the Xiaomi Home app, then extract the key with one of the community tools (the Telink flasher web page or a bindkey extractor script). The key is stored on your computer, not shared.
- Flash a custom firmware such as PVVX or ATC. The thermometer then broadcasts in clear, you do not need a bindkey, and the battery lasts even longer.
Both work well. Option 1 is the least risky if you want to touch nothing.
Step 3: the configuration
Create livingroom.yaml:
esphome:
  name: livingroom

esp32:
  board: esp32dev

wifi:
  ssid: !secret wifi_ssid
  password: !secret wifi_password

logger:

api:
  encryption:
    key: !secret api_key

ota:
  - platform: esphome
    password: !secret ota_password

web_server:
  port: 80

esp32_ble_tracker:

sensor:
  - platform: xiaomi_lywsd03mmc
    mac_address: "A4:C1:38:12:34:56"
    bindkey: "your_32_character_bindkey_here"
    temperature:
      name: "Living room temperature"
    humidity:
      name: "Living room humidity"
    battery_level:
      name: "Living room thermometer battery"

binary_sensor:
  - platform: status
    name: "Living room ESP32 status"
And a secrets.yaml next to it, so your passwords never end up in the main file:
wifi_ssid: "MyWifi"
wifi_password: "mypassword"
api_key: "generate-one-in-the-esphome-dashboard"
ota_password: "choose-a-password"
The important part is esp32_ble_tracker:. It makes the ESP32 listen to Bluetooth broadcasts. It never pairs with the thermometer, so the thermometer battery is not affected.
Step 4: flash it
The easiest way is the ESPHome dashboard. With Docker:
docker run --rm -p 6052:6052 -v "$PWD/config":/config esphome/esphomeOr with Python:
pip install esphome esphome-device-builder
esphome dashboard config
Open http://localhost:6052, add your file, click Install and choose Plug into this computer for the first flash. The dashboard compiles the firmware (the first build takes a few minutes), uploads it and shows the logs.
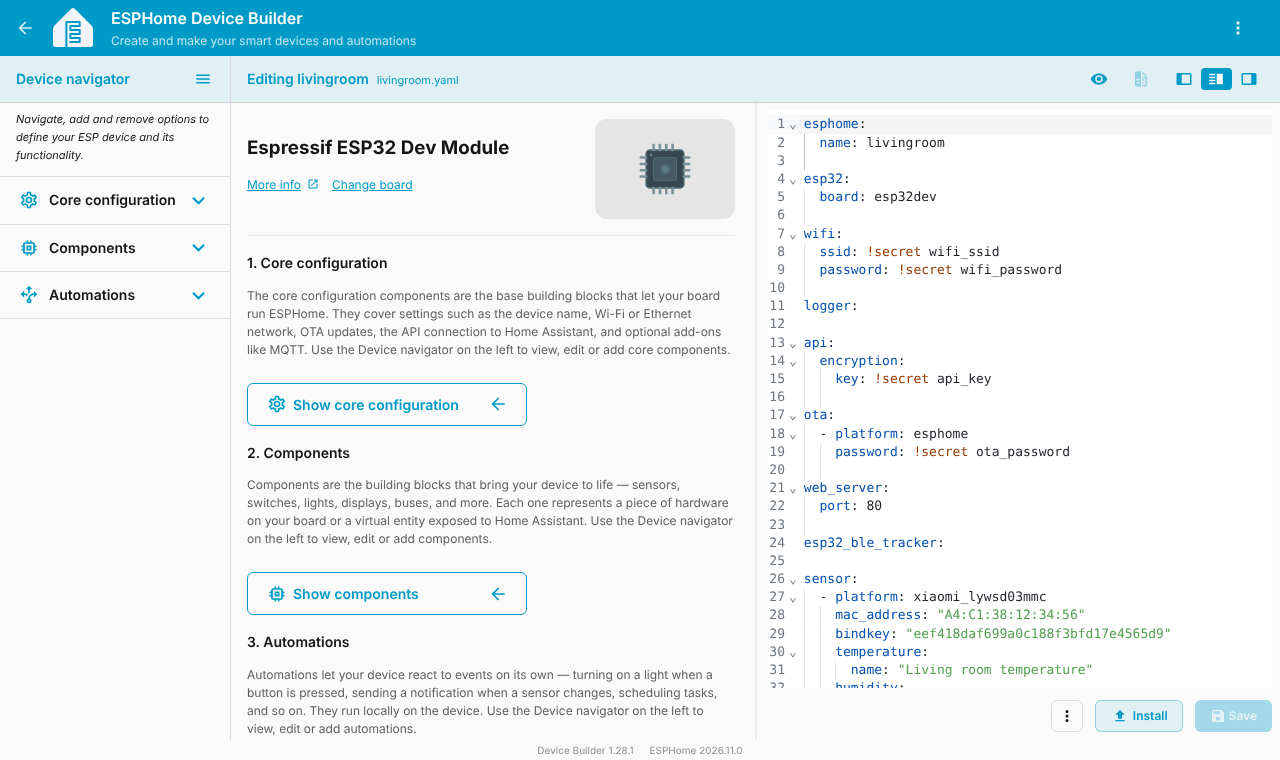
Once the logs show temperature and humidity values, it works. Next time, choose Wirelessly: no cable needed.
The ESP32 also serves a small web page at http://livingroom.local with the live values. Handy to check from your phone.
Step 5: Home Assistant
Home Assistant discovers the device automatically: go to Settings, Devices and services, and accept the new ESPHome device, entering the api_key when asked. You now have temperature, humidity and battery entities, with history graphs. Add them to a dashboard or trigger a heating automation.
Tips
- One ESP32 can listen to several thermometers. Add one
xiaomi_lywsd03mmcblock per MAC address. - Bluetooth range is about 10 metres indoors. Walls matter. Place the ESP32 near the thermometers.
- The ESP32 can do more at the same time: the DHT22 tutorial shows a wired sensor.
Conclusion
For a few euros you get a private, local temperature monitor that works even when the internet is down. The same ESP32 can then do a lot more. If something does not work for you, or if you have another sensor you want to connect, tell us through the contact page.
These configurations were validated with esphome config. The MAC address and keys in the examples are placeholders: replace them with yours.